|
My Model T Fordbreaks her crank...
In March 2009, my Model T Ford packed for a long weekend away with the club, I headed off in the late afternoon to set up camp, ready for a morning start to our long weekend of touring. Having filled up the tank to the brim, we all pulled out into what was fortunately light traffic to climb a moderate hill and head off into the back roads of the touring country. Accelerator pulled down things abruptly went sour as, with a loud bang, we rolled to the side of the road. Fortunately, the driver beind me was an experienced engine rebuilder and mechanic and the instant diagnosis was a broken crankshaft.
It has taken me over a year to get the funds together to get this fixed. My engine had always had it's characteristic rattles and knocks that came and went as many a Model T Ford does and a decision was made early in the peace to do it right the first time and do a thorough engine rebuild. Reluctant to replace the crankshaft with another 80yr old previously stressed crank, I opted to fork out the considerable sum required for a newly manufactured counterbalanced crankshaft. This is the ongoing story of the rebuild of my Model T Ford engine.
With the car trailered to the workshop, preparations are made to extract the engine from the car. As this is a 1927 Model T Ford, extraction is not the easiest of tasks. The engine must be removed at a very steep angle to clear the pedals past the firewall, so the headlights and bar were removed as well.
With the engine hoisted clear of the chassis, it hangs suspended on the engine crane.
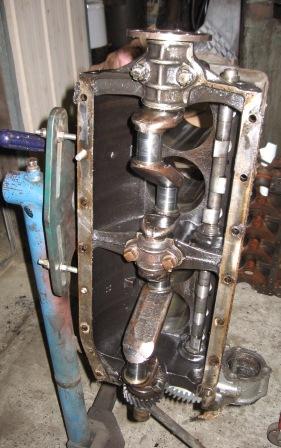
The engine has to join a queue of engine work to be completed, so before being placed on a trolley, I took the opportunity to have a peek in the crankcase and see just what damage had been done.
The first thing I met, with the inspection cover off, a collection of babbitt filings collected in the number one dipper space.


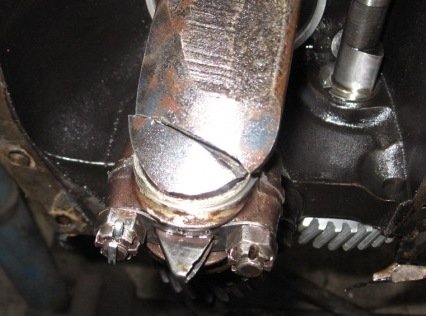
Although there is general wear in all, the exhaust valve for cylinder 4 is the most recessed.
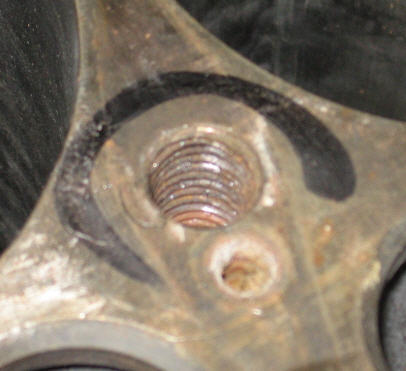
With all the hogshead bolts removed and the band adjustments backed off, the hogshead will simply lift off. With mine removed I discovered a few things. My brake band was showing a fair bit of heat damage. As I have Kevlar bands, this had caused glazing of the band. The second problem was that the low gear band was worn on one side only. This was caused by the band material not being fixed tightly to the steel band by the rivets, allowing the kevlar to move sideways. With the bands removed, the next issue found was considerable wear of the triple gear bushes. This was a bit of a surprise as the transmission has been working faultlessly and with no unpleasant noises.
With the engine mounted on an engine stand, the sump was removed and the engine rotated to give better access to the bearing caps.
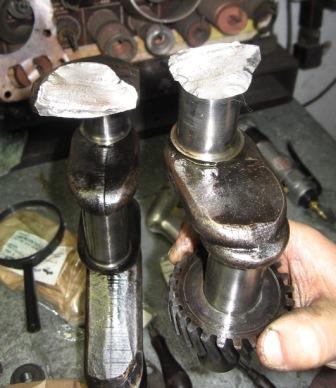
Even without removing the crankshaft, the damage was clearly evident.
With all the bearing caps removed, the damage was clear. Unfortunately, the babbitt in both the caps and block was very good and had minimal wear and it seemed a waste to remove it. A decision was made however, to ensure longevity from this engine rebuild, that the babbitt is to be replaced and bored back to standard specs. The crankshaft was lifted and the shear point examined.
All cleaned up and ready to go...
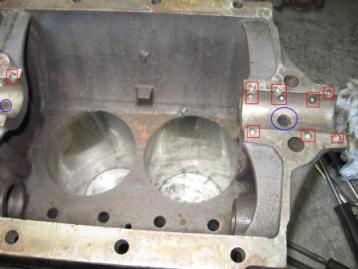
As you can see in this photo above and also the one preceding, the block has had additional "peg holes" drilled into it around the bearings. The pegs originally drilled by Henry Ford (marked in the photo below in blue) are centred at the bottom of where the babbit was poured into the block. Those marked in red are additional pegs drilled by the person who last reconditioned the engine. These would have been uneccessary had the babbit been poured correctly. The purpose of these pegs is to help secure the babbit in place in the block, preventing it from slipping and rotating with the crankshaft.
With the babbit knocked out, some obvious faults became apparent. You can see on the back of the babbit, that the yellowing colour indicates that little or no tinning of the block was completed. This is necessary to ensure that the babbit adheres to the engine block successfully. In addition, engine oil had seeped under the babbit and would have eventually led to bearing failure. Only those additional pegs drilled were holding the babbit in place in the block.
With this job done, attention was turned to the caps. Although difficult to see in this photo. Knocking out some of the babbit here showed that it had been correctly poured, although it was quite thin.
Block cleaned, babbit knocked out - the engine is ready to go off to have new babbit poured. Before leaving, some critical measurements are to be taken. We're going a slightly different path with the pistons. Showing little wear, other than some around the piston skirts, they are to be coated with a teflon type coating, designed to build the piston dimensions back up to correctly fit the bore. The pistons were wet blasted to clean them up and are ready to go off for coating. This process will build the dimensions of the piston up by 2 "thou" with a teflon coating. The crowns of the pistons are being coated with a ceramic finish to improve the heat dissipation. Yet another modern process that provides alternatives for an engine rebuild. The pistons in my Model T Ford were just not worn enough to warrant throwing them away and this process has added benefits with the ceramic crown coating as well.
Coated Pistons

Return to Model T Ford technical page
|