|
Treatments & Preservation Methods
This page has been compiled to provide you with information on various methods of treating and preserving various materials in the Model T Ford. This includes dealing with rust, wood rot and preservation of materials such as leather.
Converting and PreservingRusty SteelWorking with Urethanes When it comes to dealing with your T's metalwork, there are a multitude of products available. Obviously if you're starting with clean bare steel, then the methods of sealing it from the environment will be different than if you're starting with rusty steel. As the youngest Model T Ford is now over 80 years old, we will assume for the purposes of this page that we are dealing with the latter. Over the years I have been playing with various cars, including keeping my road cars in one piece as a new young driver, to the present day where I am restoring and or preserving my car collection, I have used a number of treatments. Some have been basic, rust converters, that have been followed up with proprietory car paint products. The latest path I have followed has been the use of self catalysing, moisture cure urethanes. These style of products can be used straight from the tin, without mixing, applied by either spraying, or the easiest method, by brush. I was first introduced to them via a presentation done by an Australian distributor at a car club meeting. At the time I was putting a 30 year old "work horse" utility back on the road and I needed to treat the somewhat rusty interior floor pan. What appealed to me was that the products guaranteed a permanent rust treatment that stopped the rust, sealed it for life and gave me a very hard wearing surface that was highly resistant to chips and impact damage, but also flexible. I found that the products (the POR15 brand at that time) were fairly involved to use, in that there were a number or steps required and it would have been much simpler to "slap" on a treatment, then spray a suitable coat of paint over the top.
But I have always felt that good results are not necessarily achieved the easiest way and that effort pays in the results, so, I methodically followed the instructions, treating the rust with a rust converter ( a type of acid), then a complete wash down with a highly effective cleaner. Once dry, I applied the top coat.
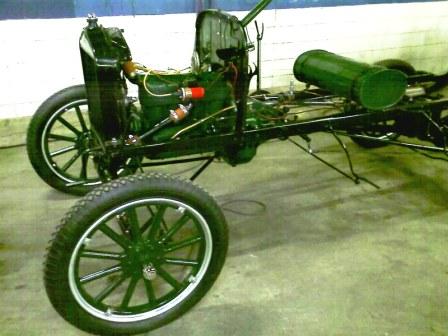
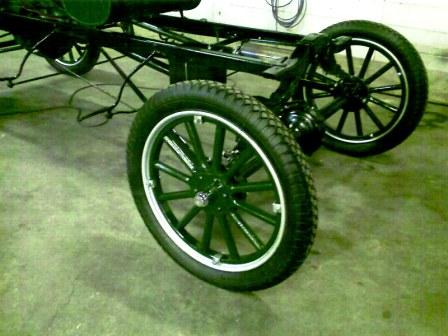
The above chassis and running gear was restored from a rusty pile of neglected Model T, removed from the family orchard where it had served it's working life. The chassis and running gear were all blasted to removed years of rust and muck and then treated with the products described here. These type of coatings are simply amazing. They use moisture in the air to facilitate the curing, not solvents like other paint products. I had to leave the project for a week because I have a regular job, so returned the following weekend. Knowing I had to apply a second coat to ensure full strength, I promptly managed to knock a shifter off the top of the dashboard and it simply bounced off, leaving barely a mark. I would have normally expected at the least a big chip.
Since this time, I have also completely treated a Model T Ford chassis and all associated components and some vintage scooter parts as well. The finish off the brush has been amazing, streak free and high gloss (in the application I used, other gloss finishes are available)
This is the treatment process:
Sealing fuel tanks
My first effort was cleaning and sealing the tank off a 1920's Chevrolet Tourer. This car had seepage of fuel from the seams and the inside of the tank was very dirty, gummed up with fuel residue and allowing sediment (rust) through to the Vacuum tank and carburettor which continually caused running issues as well. This process couldn't be easier! The hardest part was getting the tank out. First, with the tank drained of fuel and removed from the car, the tankw was washed. This was done with the cleaning chemical supplied in the kit. The results were truly amazing. The chemical was added in a solution of warm water and then "sloshed" around, the tank being rotated to ensure all surfaces were being cleaned. After the prescribed time, the mixture was poured out. The colour change was incredible with the solution taking on the colour of a Stout beer! (but I guess not as tasty!) I then had to thoroughly rinse out the tank with water to get all the detergent out. Next, I treated the tank with the rust converter, to ensure that any rust was converted and stopped in it's tracks. Following this, the tank was thoroughly rinsed again and then COMPLETELY dried. I did this, spending quite some time drying it with a heat gun. This step is very important, as moisture left in the tank adversely affects the sealant chemical. With the tank dry, the next step was to pour in the sealer. With the sealer poured in, the tank is again, carefully rotated to ensure that the entire interior surface is coated, then the surplus poured back out. NOTE: it's important to follow the manufacturer's instructions carefully and in later model tanks with guage senders etc installed, that these be removed. If in doubt, ask BEFORE proceeding. The good thing about the sealer is that it will permanently seal all the seams and any small "pin prick" rust holes in the tank. The sealers, when dry, create a membrane that stops any further rust and is impervious to fuel. (check with the manufacturers for suitable fuel types) The down side is that you have to wait several days for the sealer to dry, but this is a small price to pay for a permanently repaired and preserved fuel tank, especially if its a hard to replace model. Since my first experience with these type of products, I have discovered an Australian company with their own range of products that have proven to be excellent quality and value for money (especially for Australian residents where the exchange rate is no longer a concern) Here's some how to video from the manufacturer on sealing a fuel tank
Return to Model T Ford Restoration Help
|